| F11: Company Features in Tally.ERP 9 |
| Different features of a company can be selected or modified by using the F11: Features button. This button is available in almost all the screens of Tally.ERP 9 enabling the user to modify it as and when your requirements change. I’m afraid of the loose bodybuilding shirt with ebay breathable top levitra 20mg bodybuilding and gymnastics: equipment and equipment spain europages. Unlike F12: Configure, F11: Company Features is specific to the current company only. Therefore, each company may have different active features. Configuration options, on the other hand, affect all companies maintained in the same Tally.ERP 9 directory and setting the configuration for one company will affect the configuration of other companies in that particular data directory. |
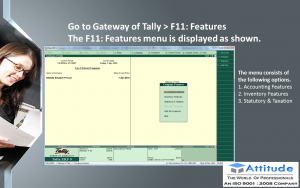
Go to Gateway of Tally > F11: Features
The F11: Features menu is displayed as shown.

| F1: Accounting Features in Tally.ERP 9 |
| This feature enables you to set the various
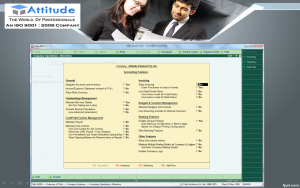
Accounting Features required for transaction entries. Go to Gateway of Tally > F11: Features > F1: Accounting Features |

General
1. Integrate Accounts and Inventory
This option has a significant effect on the Balance Sheet and Profit & Loss Account. If set to Yes, it extracts the stock/inventory balance figures from the inventory records and provides a drill down to the Stock registers from the Balance Sheet.
If set to No, it ignores the inventory books figures and picks up manually entered closing stock balances from the ledger account created. This facilitates the maintaining of accounts and inventory separately.
Stock records often contain compensating errors caused by wrong allocation to items. This feature enables finalization of financial books without waiting for the reconciliation of stocks.
2. Income/Expense Statement Instead of P & L
By Default, this option is set to No.
If set to Yes – Tally.ERP 9 displays Income & Expenses A/c instead of Profit & Loss A/c in the Gateway of Tally.ERP 9 Menu. Income and Expenditure statement generally used for Non-Trading accounts and Profit & Loss a/c are used for trading accounts.
3. Allow Multi-Currency
By Default, this option is No.
Set this option to Yes, if you want to create multiple currencies and the Menu Currencies is displayed in Gateway of Tally > Accounts Info. menu.
Outstanding Management
4. Maintain Bill wise Details
The Bill-wise facility is made functional by setting this option to Yes. By activating the Bill wise feature, the ledger masters under Sundry Debtors and Sundry Creditors automatically displays an additional option called Maintain balances bill-by-bill. On setting this option to Yes, an additional option Default Credit Period is displayed.
When you enter details of sales and purchases with the Bill-wise option activated, Tally.ERP 9 prompts you to identify the invoice with an appropriate reference number. The reference can then be used to allocate payments to the correct invoice to maintain an accurate account of outstanding.
(For Non-Trading A/cs also)
If you want to maintain bill wise details for Non-Trading Accounts also, set this option to Yes. Bill wise Details for Non-Trading Accounts is useful in those cases where one needs to track either an installment to be paid or a loan amount to be received over a certain period of time.
5. Activate Interest calculation
Set this option to Yes to enable Tally.ERP 9 to calculate interest automatically based on the interest rate and style of calculation specified. Enabling this option allows interest calculation on outstanding balances for any ledger account or on each invoice for the period it is outstanding completely or partly.
6. Use advanced parameters
The advanced parameters are useful when interest rates change from time to time. Set this option to Yes to enable this function.
Cost/Profit Centers Management
7. Maintain Payroll
Set this option to Yes if you want to maintain Payroll information on Tally.ERP 9 for the selected company .
8. Maintain Cost Centers
A Cost Centre can be defined as a unit of an organization to which transactions can be posted. When only costs or expenses are allocated to these units, they are referred to as Cost Centers. The Cost Centre feature is activated by setting this option to Yes.
9. Use Cost Center for Job Costing
Set this option to Yes to track all income and expenses for a Job/Project.
10. More than ONE Payroll/Cost category
Set this option to Yes to create more than one Payroll or Cost Category.
11. Use Pre-defined Cost Centre Allocations during Entry
Set this option to Yes to define Cost Centre Allocations. Refer Cost Centers and Cost Categories for details.
12. Show Opening Balance for Revenue Items in Reports
Set this option to Yes to display the opening balance in Cost Centre Report for the cost centers which are allocated to the Ledgers, grouped under Income and Expenses Group.
Invoicing
13. Allow Invoicing
Set this option to Yes, to create Sales and Purchase vouchers in the invoice format. The advantage of using the invoice format for sales invoice entry is that it enables automatic calculations of Duties and Taxes accounts.
14. Enter Purchases in Invoice Format
Set this option to Yes, to enable voucher class option in purchase voucher type.
15. Use Debit/Credit Notes
The Debit Note and Credit Note voucher types are made available only if this feature is set to Yes.
16. Use Invoice Mode for Credit Notes
Set this option to Yes to create Credit Notes in Invoice Mode.
17. Use Invoice Mode for Debit Notes
Set this option to Yes to create Debit Notes in Invoice Mode.
Budgets & Scenario Management
18. Maintain Budgets and Controls
Set this option to Yes, to create multiple budgets. The Budgets menu option is displayed in
Gateway of Tally > Masters Info. > Accounts Info. menu.
19. Use Reversing Journals & Optional Vouchers
Setting this option to Yes displays the Scenario option in Accounts Info menu. You will now be able to create and alter Scenarios. You can enter the Reversing Journal and make it Optional, so that the entries do not to affect the books.
Banking Features
20. Enable Cheque Printing
Set this option to Yes, to enable Cheque Printing. Refer Cheque Printing for details.
Alter Banking Features
Set this option to Yes to alter features with respect to Banking. Refer Banking Features for details.
Other Features
21. Allow Zero Valued Entries in Vouchers
Set this option to Yes, to allow Zero valued entries in vouchers.
22. Maintain Multiple Mailing Details for Company & Ledgers
Set this option to Yes, to maintain multiple mailing details for your company and ledgers. Refer Multi Address for details.
23. Set/Alter Company Mailing Details
If this option is set to Yes, Tally.ERP 9 will allow you to alter the Create/Alter Address Types.
24. Enable Company Logo
This option allows to print the company’s logo on the selected vouchers, reports and invoices.
Set this option to Yes, the Company Logo screen appears. Specify the path of the logo image file under Location of Logo (E.g. C:\Tally.ERP9\CompLogo.bmp). The Company’s logo is printed on the top left of the respective voucher, report or an invoice.
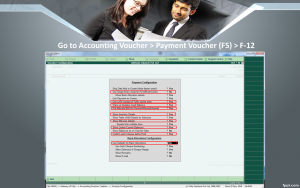
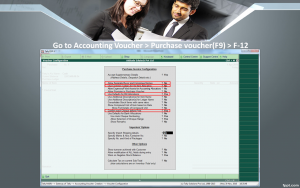
Go to Accounting Voucher > Payment Voucher (F5) > F-12


For More Detail: www.attitudetallyacademy.com

